|   BACK BACK
CO 75[83, 91, 99, 107, 115, 125] sts.
Work 4 rows in 1x1 Rib, ending with a WS row.
Work in stockinette st until work measures 8 inches from CO edge, ending with a RS row.
Next Row [WS]: P5[5, 4, 8, 8, 7, 8], p2tog, [p5(6, 7, 7, 8, 9, 10), p2tog] nine times, p5[4, 4, 8, 7, 7, 7]. 65[73, 81, 89, 97, 105, 115] sts. Work 8 rows in 1x1 Rib, ending with a WS row. Bodice:
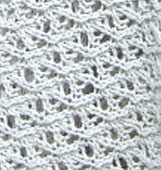
Set-up Row [RS]: K2[0, 4, 2, 0, 4, 3], work in Lace Pattern to last 2[0, 4, 2, 0, 4, 3] sts, k2[0, 4, 2, 0, 4, 3]. This row sets pattern for bodice. Pattern Repeat section outlined in red is worked 4[5, 5, 6, 7, 7, 8] times in each row. Continue in pattern as set, maintaining 2[0, 4, 2, 0, 4, 3] sts at each edge in stockinette st, until work measures 13 inches, ending with a WS row. Shape Armholes:
Note: See “Shaping Note” in Pattern Notes, above. BO 4[5, 6, 7, 8, 9, 10] sts at beginning of next 2 rows. 57[63, 69, 75, 81, 87, 95] sts. Next Row [RS]: K1, k2tog, work in pattern to last 3 sts, ssk, k1.
P 1 row.
Repeat these 2 rows 1[1, 2, 2, 3, 3, 4] times more. 53[59, 63, 69, 73, 79, 85] sts. Continue in pattern until work measures 18.5[19, 19.5, 20, 20.5, 21, 21.5] inches (armhole measures 5.5[6, 6.5, 7, 7.5, 8, 8.5] inches), ending with a WS row. Shape Back Neckline:
Next Row [RS]: Work 13[15, 16, 18, 19, 21, 23] sts in pattern, place next 27[29, 31, 33, 35, 37, 39] sts on st holder, join new ball of yarn and work last 13[15, 16, 18, 19, 21, 23] sts in pattern.
Work 5 more rows in pattern, working each set of 13[15, 16, 18, 19, 21, 23] sts using attached ball of yarn. Work measures 19.5[20, 20.5, 21, 21.5, 22, 22.5] inches.
BO both sets of sts. LEFT FRONT
CO 37[41, 45, 49, 53, 57, 61] sts.
Work 4 rows in 1x1 Rib, ending with a WS row.
Work in stockinette st until work measures 8 inches from CO edge, ending with a RS row. Next Row [WS]: [P6(7, 8, 9, 10, 11, 12), p2tog] four times, p5. 33[37, 41, 45, 49, 53, 57] sts. Work 8 rows in 1x1 Rib, ending with a WS row. Bodice:
Set-up Row [RS]: K2[0, 4, 2, 0, 4, 3], work 25[37, 37, 37, 49, 49, 49] sts in Lace Pattern, k6[0, 0, 6, 0, 0, 5]. This row sets pattern for bodice. Pattern Repeat section outlined in red is worked 1[2, 2, 2, 3, 3, 3] times in each row. Continue in pattern as set until work measures 13 inches, ending with a WS row. Shape Armholes:
Note: See “Shaping Note” in Pattern Notes, above. Next Row [RS]: BO 4[5, 6, 7, 8, 9, 10] sts, continue in pattern to end. 29[32, 35, 38, 41, 44, 47] sts P 1 row.
Next Row [RS]: K1, k2tog, work in pattern to end.
Repeat these 2 rows 1[1, 2, 2, 3, 3, 4] times more. 27[30, 32, 35, 37, 40, 42] sts. Continue in pattern until work measures 14.5[15, 15.5, 16, 16.5, 17, 17.5] inches (armhole measures 1.5[2, 2.5, 3, 3.5, 4, 4.5] inches), ending with a WS row. Shape Neckline:
Next Row [RS]: Work 13[15, 16, 18, 19, 21, 23] sts in pattern, place last 14[15, 16, 17, 18, 19, 19] sts on st holder.
Work remaining sts in pattern until work measures same as back to shoulder.
BO all sts. RIGHT FRONT
CO 37[41, 45, 49, 53, 57, 61] sts.
Work 4 rows in 1x1 Rib, ending with a WS row.
Work in stockinette st until work measures 8 inches from CO edge, ending with a RS row. Next Row [WS]: P5, [p2tog, p6(7, 8, 9, 10, 11, 12)] four times. 33[37, 41, 45, 49, 53, 57] sts. Work 8 rows in 1x1 Rib, ending with a WS row. Bodice:
Set-up Row [RS]: K6[0, 0, 6, 0, 0, 5], work 25[37, 37, 37, 49, 49, 49] sts in Lace Pattern, k2[0, 4, 2, 0, 4, 3]. This row sets pattern for bodice. Pattern Repeat section outlined in red is worked 1[2, 2, 2, 3, 3, 3] times in each row. Continue in pattern as set until work measures 13 inches, ending with a RS row.  Shape Armholes: Shape Armholes:
Note: See “Shaping Note” in Pattern Notes, above.
Next Row [WS]: BO 4[5, 6, 7, 8, 9, 10] sts, p to end. 29[32, 35, 38, 41, 44, 47] sts Next Row [RS]: Work in pattern to last 3 sts, ssk, k1.
P 1 row.
Repeat these 2 rows 1[1, 2, 2, 3, 3, 4] times more. 27[30, 32, 35, 37, 40, 42] sts. Continue in pattern until work measures 14.5[15, 15.5, 16, 16.5, 17, 17.5] inches (armhole measures 1.5[2, 2.5, 3, 3.5, 4, 4.5] inches), ending with a RS row. Shape Neckline:
Next Row [WS]: P13[15, 16, 18, 19, 21, 23], place last 14[15, 16, 17, 18, 19, 19] sts on st holder.
Work remaining sts in pattern until work measures same as back to shoulder.
BO all sts. SLEEVES (Make 2)
CO 45[49, 55, 59, 65, 69, 75] sts.
Work 4 rows in 1x1 Rib. Set-up Row [RS]: K4[0, 3, 5, 2, 4, 1], work 37[49, 49, 49, 61, 61, 73] sts in Lace Pattern, k4[0, 3, 5, 2, 4, 1]. This row sets pattern for sleeve. Pattern Repeat section outlined in red is worked 2[3, 3, 3, 4, 4, 5] times in each row. Continue in pattern as set, maintaining 4[0, 3, 5, 2, 4, 1] sts at each edge in stockinette st, until work measures 2.5 inches, ending with a WS row. Shape Sleeve Cap:
BO 4[5, 6, 7, 8, 9, 10] sts at beginning of next 2 rows. 37[39, 43, 45, 49, 51, 55] sts. Next Row [RS]: K1, k2tog, work in pattern to last 3 sts, ssk, k1.
P 1 row.
Repeat these 2 rows 6[7, 10, 11, 13, 14, 15] times more. 23[23, 21, 21, 21, 21, 23] sts. BO 2 sts at beginning of next 6 rows. BO remaining 11[11, 9, 9, 9, 9, 11] sts. |
| Weave in ends and block pieces to measurements shown in schematic.
Sew shoulder seams. Neckline Ribbing:
With RS facing, k held 14[15, 16, 17, 18, 19, 19] sts of right front neckline, place marker; pick up and k 28 sts (approx. 3 sts for every 4 rows) along vertical front and back neckline edge, place marker; k held 27[29, 31, 33, 35, 37, 39] sts of back neckline, placing marker before last st; pick up and k 28 sts along vertical back and front neckline edge, placing marker before last st; k held 14[15, 16, 17, 18, 19, 19] sts of left front neckline. 111[115, 119, 123, 127, 131, 133] sts. Row 1 [WS]: P1[2, 1, 2, 1, 2, 2], [k1, p1] to last 0[1, 0, 1, 0, 1, 1] sts, p0[1, 0, 1, 0, 1, 1].
Row 2 [RS]: [Work in 1x1 Rib as set to 1 st before marker, S2KP, removing marker] four times, continue in 1x1 Rib as set to end.
BO remaining 103[107, 111, 115, 119, 123, 125] sts in pattern. Button Band:
With RS facing, beginning at upper corner of left front edge, pick up and k 73[75, 77, 79, 81, 83, 87] sts (approx. 4 sts for every 5 rows) along left front edge.
Work 5 rows in 1x1 Rib. BO all sts in pattern. Buttonhole Band:
With RS facing, beginning at lower corner of right front edge, pick up and k 73[75, 77, 79, 81, 83, 87] sts along right front edge.
Work 2 rows in 1x1 Rib. Buttonhole Row [WS]: Work 3 sts in pattern, [yo, k2tog, work 16(16, 17, 17, 18, 18, 19) sts in pattern] 3 times, yo, k2tog, continue in pattern to end.
Work 2 rows in 1x1 Rib. BO all sts in pattern. Sew buttons to button band opposite buttonholes.
Sew sleeves into armholes.
Sew sleeve seams and side seams.
Weave in any remaining ends. 
|

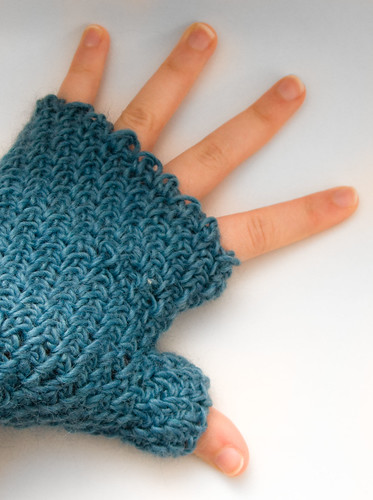
 Well, this is quite different from the "Easiest Crochet Necklace" I've shown in the other post, and I've tried to write down an outline of this one's pattern.
 I've made it even in a bright purple cotton yarn, and I'm really happy with the both.
 These are very easy, and I hope you won't have problems making them.


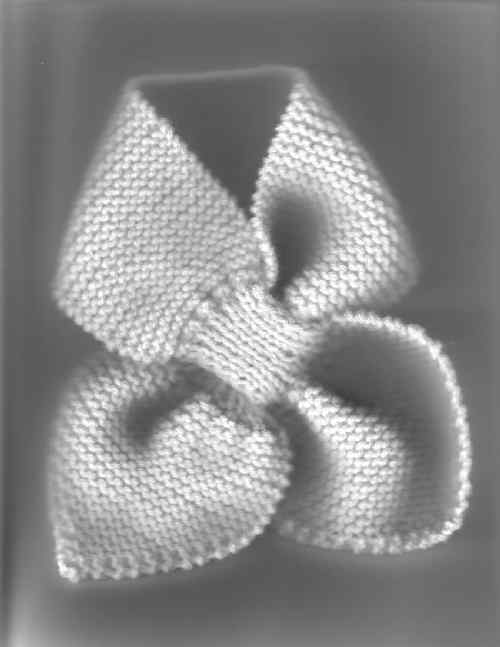
 CO 85 sts.